Rebolting and Maintenance
The hardware placed on routes degrades over time, and at some point in the future all routes will require rebolting. Rebolting is more tricky and time consuming than bolting a new route because old bolts must be removed, and we should intend to leave the rebolted route in a better state than it was previously.
Moving towards best practice
Depending on the rock type, rock angle and crag ethics there are many variations of safe bolts and anchors that can be used. When rebolting routes the anchors installed must be designed to withstand repeated and heavy use for 50 years or more. Many of Australia's old carrot bolts out there have been used for over 50 years already!
When many routes in Australia were first established, there was a lack of commercially available, certified bolts designed for rock climbing. Also, cost was often a factor for the 1980's, 90's, and 00's dirtbags, who often took a 'minimum effective dose' approach to bolting. Hence the carrot bolt. We now have standards for bolts (e.g. EN 959) and many commercially produced products subject to stringent testing and quality control, at reasonable prices and readily available. It is for this reason that Safer Cliffs Australia no longer endorses the use of homemade bolts, or hardware that does not conform to EN 959. Additionally, we believe that as part of any route rebolting process, steps should be taken to adopt and install hardware to current best-practice. This means EN 959-compliant glue-in bolts, with epoxy injection glue. Unless there is a compelling case otherwise, expansion bolts should not be used for rebolting. Glue-in bolts have demonstrable superiority (see bolt types) and at present, represent world best-practice. There are crags in Spain where we see expansion bolt next to expansion bolt next to expansion bolt as they replace like with like endlessly instead of upgrading to a glue-in bolt that will last over 50 years without maintenance. Let's learn from their mistakes.
Cost should not be a decisive factor if you want to place bolts. The need to cut costs creates routes that are shoddily bolted with unsafe gear. As a general rule a five bolt sport route with an anchor will cost more than $100. If you cannot afford to pay this amount then do not even consider bolting routes in Australia. This cost is why SCA exists. Our state-based groups raise funds to help cover the costs of route maintenance for those few individuals kind enough to put in the hard work.
Retrobolting and ethics
Bolts should be replaced on a bolt for bolt basis. Extra bolts (i.e. retrobolting) should not be added unless you have permission from the first ascensionist (or where this is impossible, their contemporaries). It is not your right to change the climb to make it ‘better’, ‘safer’ or ‘more user friendly’. Bolts may be slightly repositioned to improve the safety of clipping, or the positioning of quickdraws. Where the first ascentionist is uncontactable, a group discussion on the relevant local community forum will tell you if your ideas are the same as the general community.
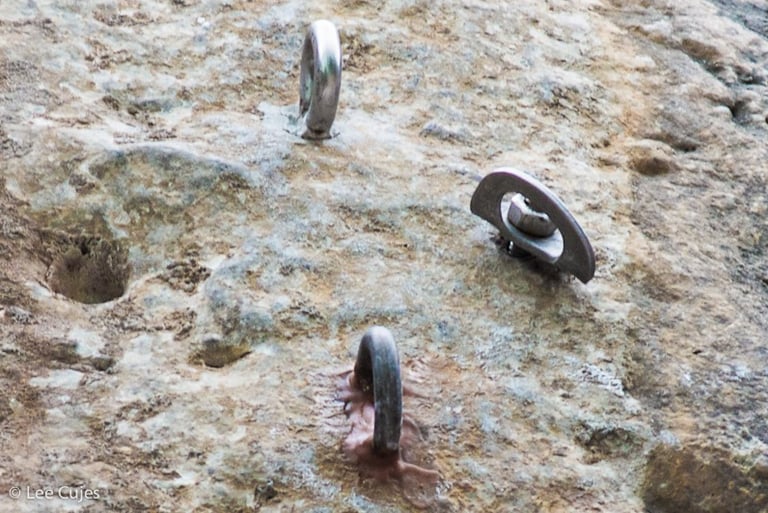
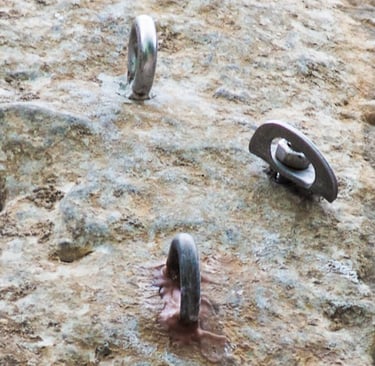
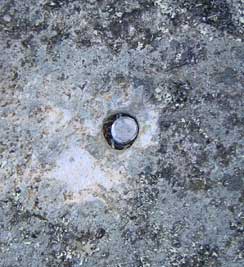
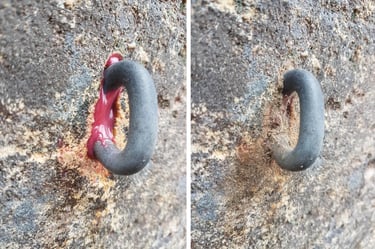
Thailand debacle showing three generations of bolts. Expansion bolt on right (bad). Shiny Fixe stainless ring at top (bad), and dull grey titanium bolt with red glue at bottom (good). This is the mess that results from not doing the rebolting job properly.
Removing old carrot bolts
Option 1: Extraction
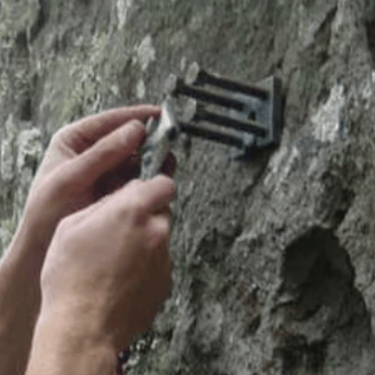
Spend the time and invest in the right tools to remove the old bolts cleanly. The aim is to extract the old bolt and reuse the hole for the new bolt. A big crowbar or a 'carrot killer' device (or more modern equivalent like this) can remove bash-in carrot bolts with ease (be careful about scarring the surrounding rock). A funkness device (hammer with a length of cable) can also extract carrots.
Option 2: Chopping
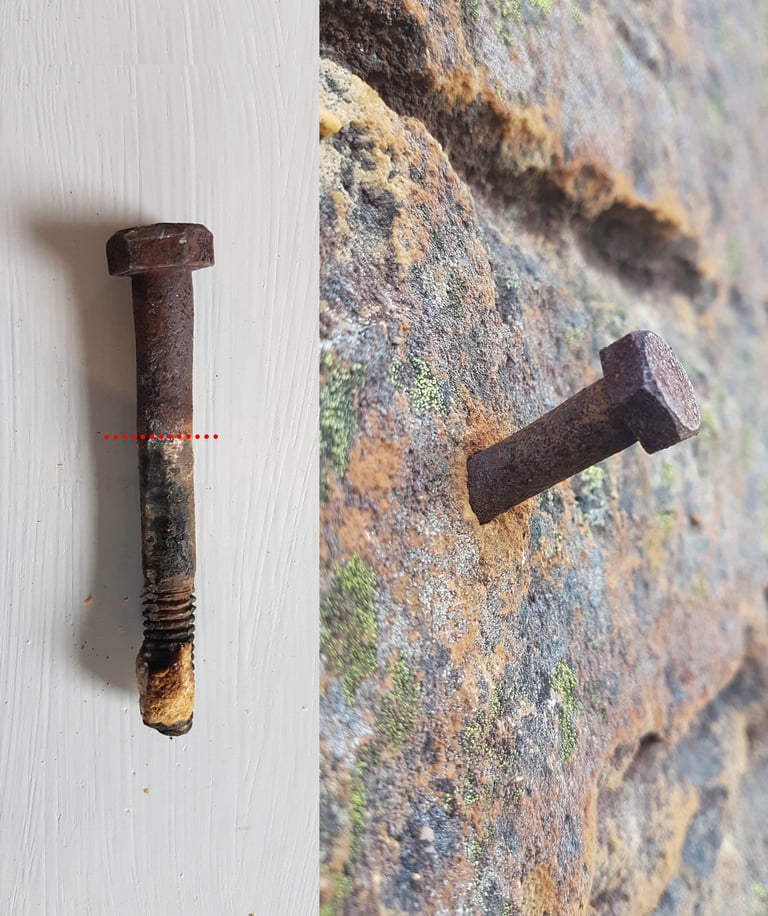
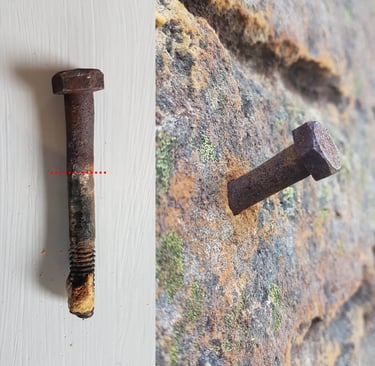
If all else fails and you cannot remove it cleanly then use a socket wrench with a big handle and twist the head of the carrot off below the surface of the rock. Cordless grinders, while being very useful tools cannot chop a bolt beneath the surface of the rock, creating an exposed stud which can injure climbers who fall on them. It also makes patching difficult as the remainder of the bolt is now sitting proud of the rock surface. Sometimes this can be beaten back in, often not.
Pic 1: Historic "Carrot Killer" device. Unless you know what you're doing to avoid scarring the rock it's probably better to avoid using one of these.
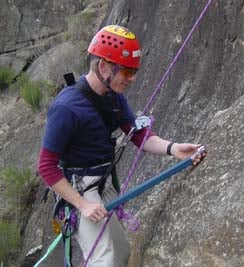
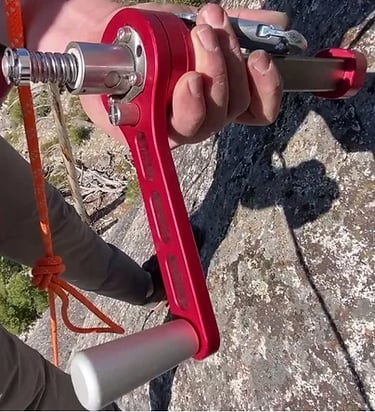
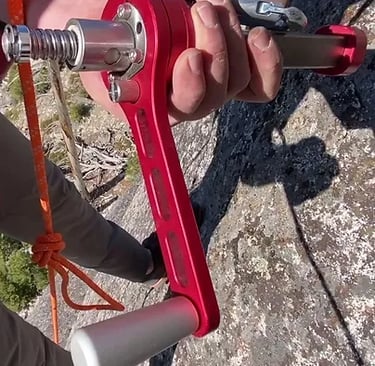
Pic 2: Wrench with bar to twist the head off a bolt. Can work well and does not require a grinder.
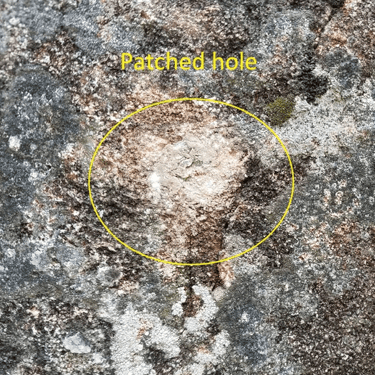
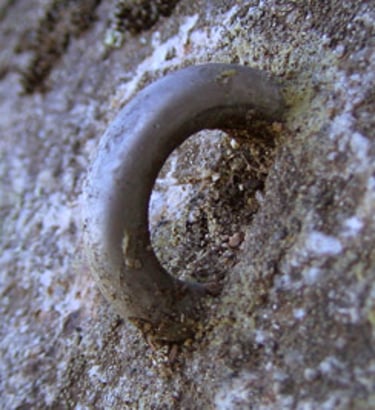
Pic 3: What's left after the head comes off - ugly! Needs patching!
Pic 4: Hole patched with epoxy and dirt.

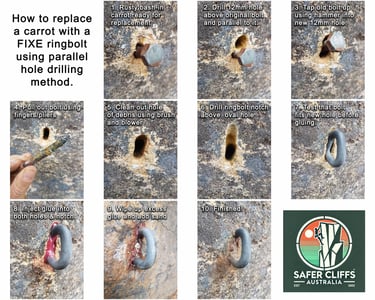
Option 3: Parallel hole method
Removing expansions and glue-ins
There are various methods that have been invented and are being used to actually extract expansions and glue-ins rather than chopping them. The rock is a finite resource, so it's important to reuse holes where we can.
The best resource to learn about this still-evolving art is over at The Bolting Bible.
Patching and camouflaging
Patching is a lesser-discussed but critical skill in quality rebolting. Whether you're filling an old hole or reinforcing holds and flakes, it's essential to understand how to replicate realistic rock texture using glue. This guide explains how to create durable, camouflaged patches that can withstand decades of weathering - including rain, sun, and hail. ⚠️ As with any glue-based work, it's messy. Be prepared with gloves and cotton rags to manage spills.

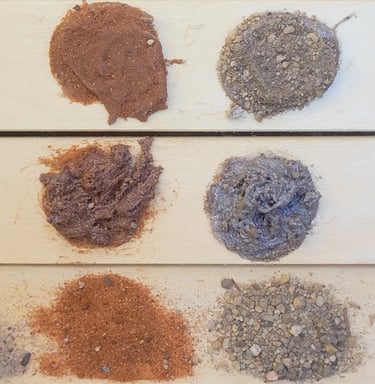

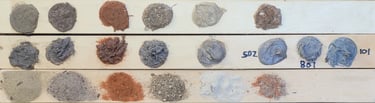
TOP: glue coloured with dust
MIDDLE: texture mixed with glue
BOTTOM: examples of texture fillers
🧪 Glue Types and Base Layer
Before applying texture or colour, every patch needs a strong glue base.
We recommend high-quality epoxy glues like Ramset 502 for cosmetic work:
Excellent rock adhesion
Long working time (so you’re not rushed)
Easily absorbs tint and sand
Avoid the following for cosmetic or structural applications:
❌ Polyester (Ramset 101) and Vinylester (Ramset 801) – poor adhesion, more like fillers than glues
❌ Silicone sealants – deteriorate over time
These alternatives don’t bind to rock or absorb colour and texture effectively
How to apply the base:
Wearing gloves, smear a thin layer of glue onto the rock — think of spreading Vegemite on toast.
Ensure the glue is pressed into the rock’s surface crystals.
This becomes the foundation for the texture layer.
🏖 Adding Texture
Texture makes or breaks the realism and function of a patch.
Key material:
Use pure sand with a range of grain sizes suited to the crag. For reinforcing a key hold, you want a textured finish akin to a gym hold — grippy, but not sharp.
🛠 Method:
Mix 50% sand with 50% grey epoxy (e.g. Ramset 502) in a container lid
Do not mix glue and sand on the rock surface
Use a nail or stick to blend into a thick, gritty paste
Apply this mix to the base glue layer with gloved fingers
Without texture: the patch will be slippery
With too much texture: it may become abrasive or sharp
💡 Pro tip: Store pre-mixed sand in a sealed Tupperware container.
🎨 Colour and Camouflage
Epoxy glue has a plastic sheen and unnatural colour. Even textured, it still shines. The final step is dusting with fine, rock-coloured powder.
In the Blue Mountains:
The best option is shale dust — found at the base of undercut cliffs. It behaves like chalk and binds beautifully into glue.
How to apply:
Throw a handful at the glued surface
Allow it to soak into the glue for 1+ hours
Blow off the excess with a battery-powered blower
Glue colours:
Ramset 502 – medium grey
Hilti HIT-RE 500, Powers Pure Epoxy – bright red
(red is harder to camouflage and needs light dust to tone it down)
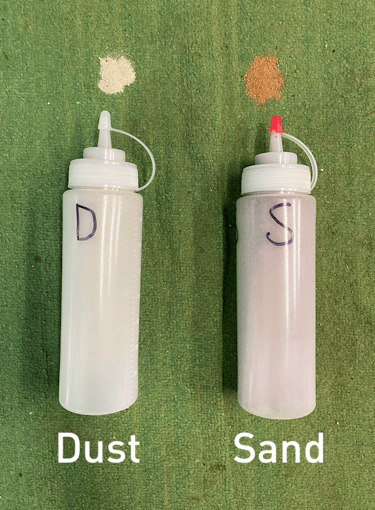
🧂Keep a small "arsenal" of colour tints in:
Tupperware containers, or better,
Squeeze bottles for direct dusting
Avoid dark dusts — they can quickly turn a patch pitch-black, which stands out on pale rock. Test colours at home, not mid-route.
🛠 Alternative: Kneadable Epoxy (patching only)
For remote locations without access to standard glue systems, Selleys Knead It Multi-Purpose Epoxy (link) is a functional fallback — but only for cosmetic patching.
Comes as a two-part tube
Mix by kneading in your fingers (Blu Tack consistency)
Press onto rock and add sand
⚠️ Limitations:
Doesn't absorb dust — poor for camo
Weaker bonding — not suitable for hold reinforcement or bolts
Use only for non-structural, aesthetic patches.
SAFER CLIFFS AUSTRALIA
Helping Keep Australian Climbers Safe
DONATE
Visit your State's page to donate and keep us moving
© 2026. All rights reserved.